Add admins and team members to a shared inbox
A shared inbox truly shines when your team also have access to use it.
Before going ahead, please note that only an admin is able to add members to a shared inbox.
When you first add a shared inbox you will be given the option to add team members as part of the setup process. If you decide not to add anyone during the setup then you can add them via the Settings at a later date.
You can access your shared inbox settings in two ways:
Quick settings
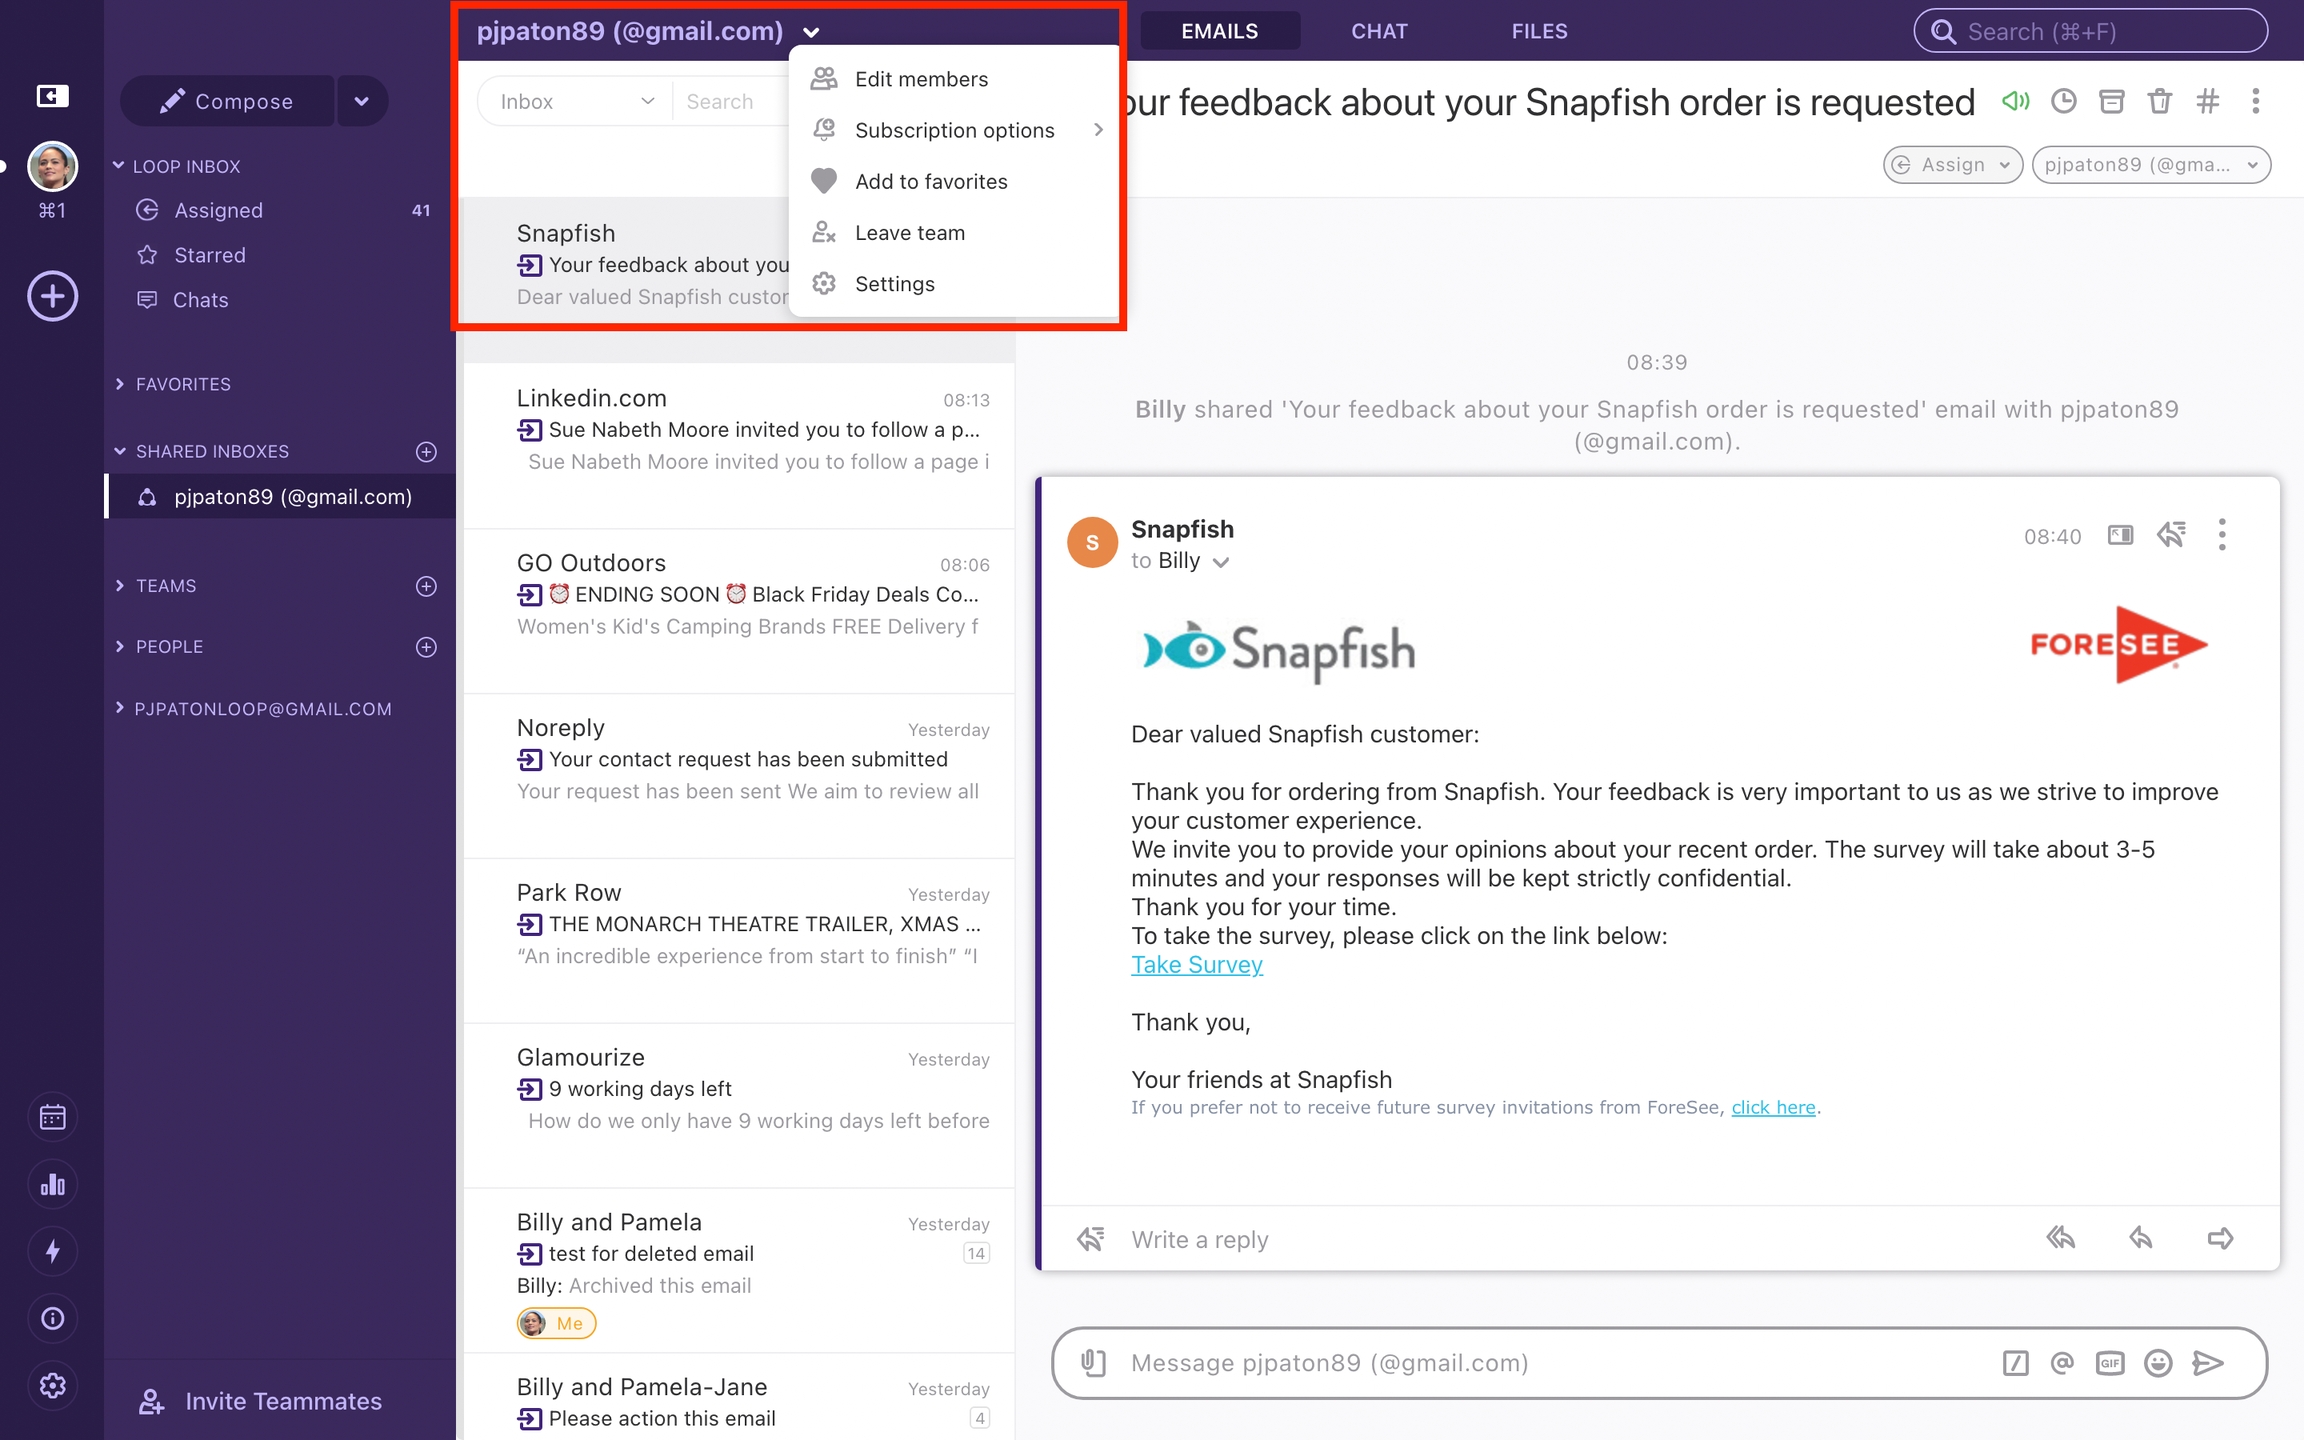
2. Advanced Settings
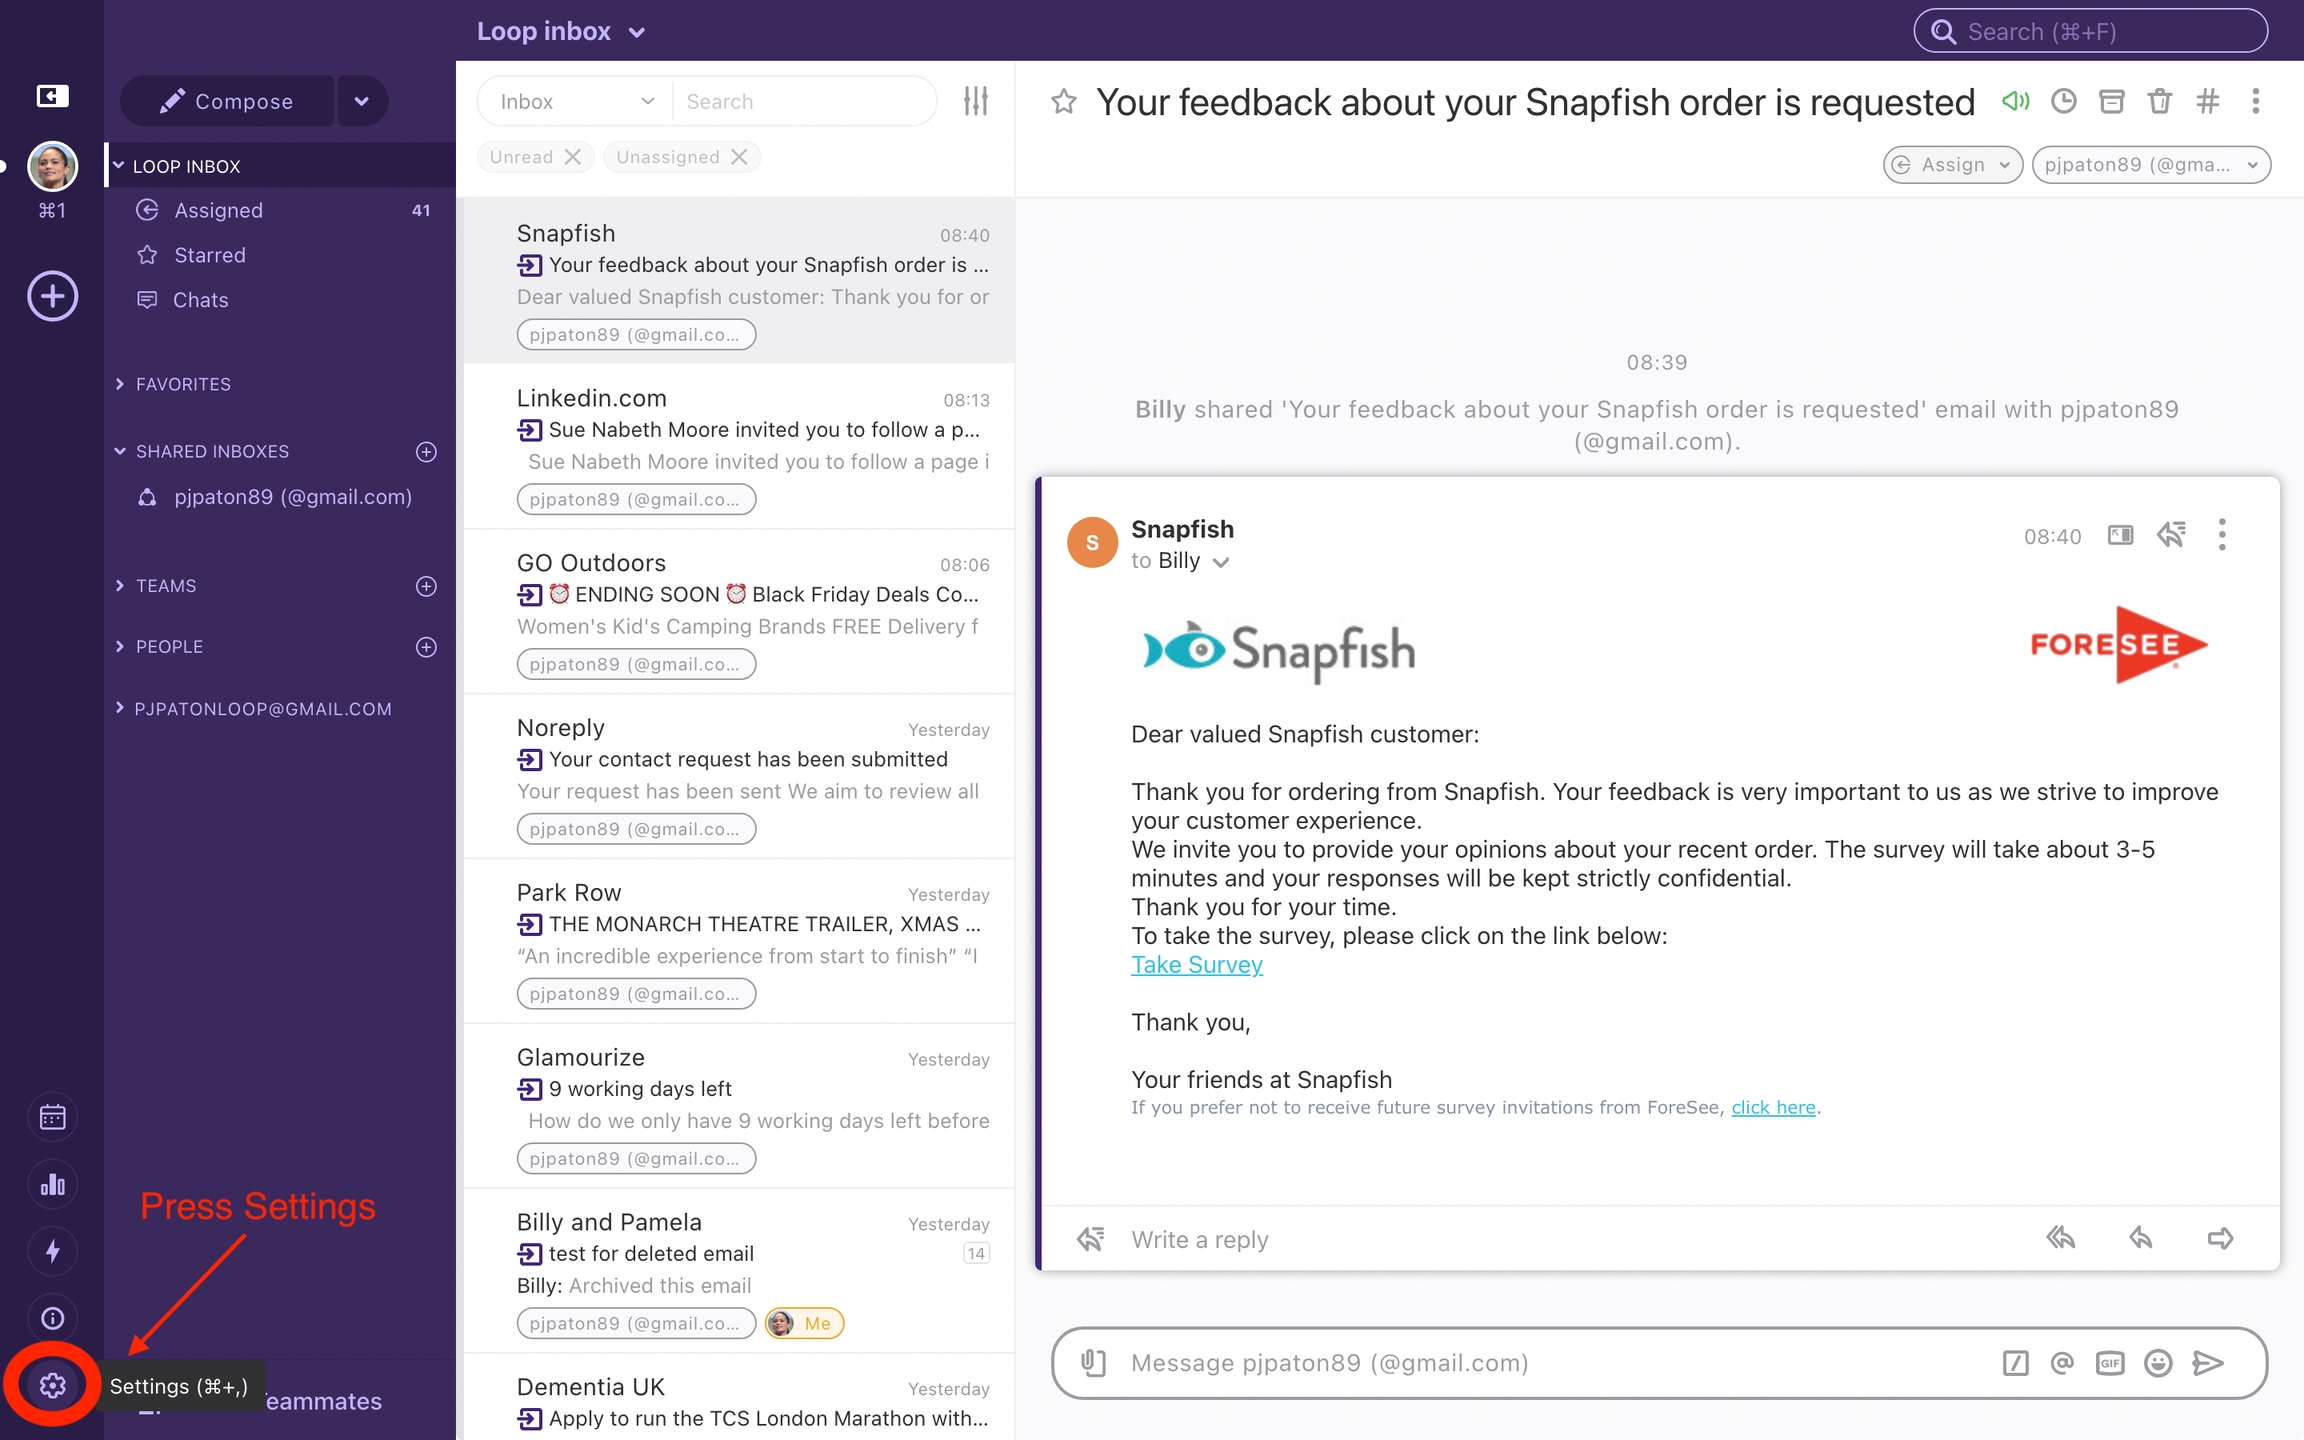
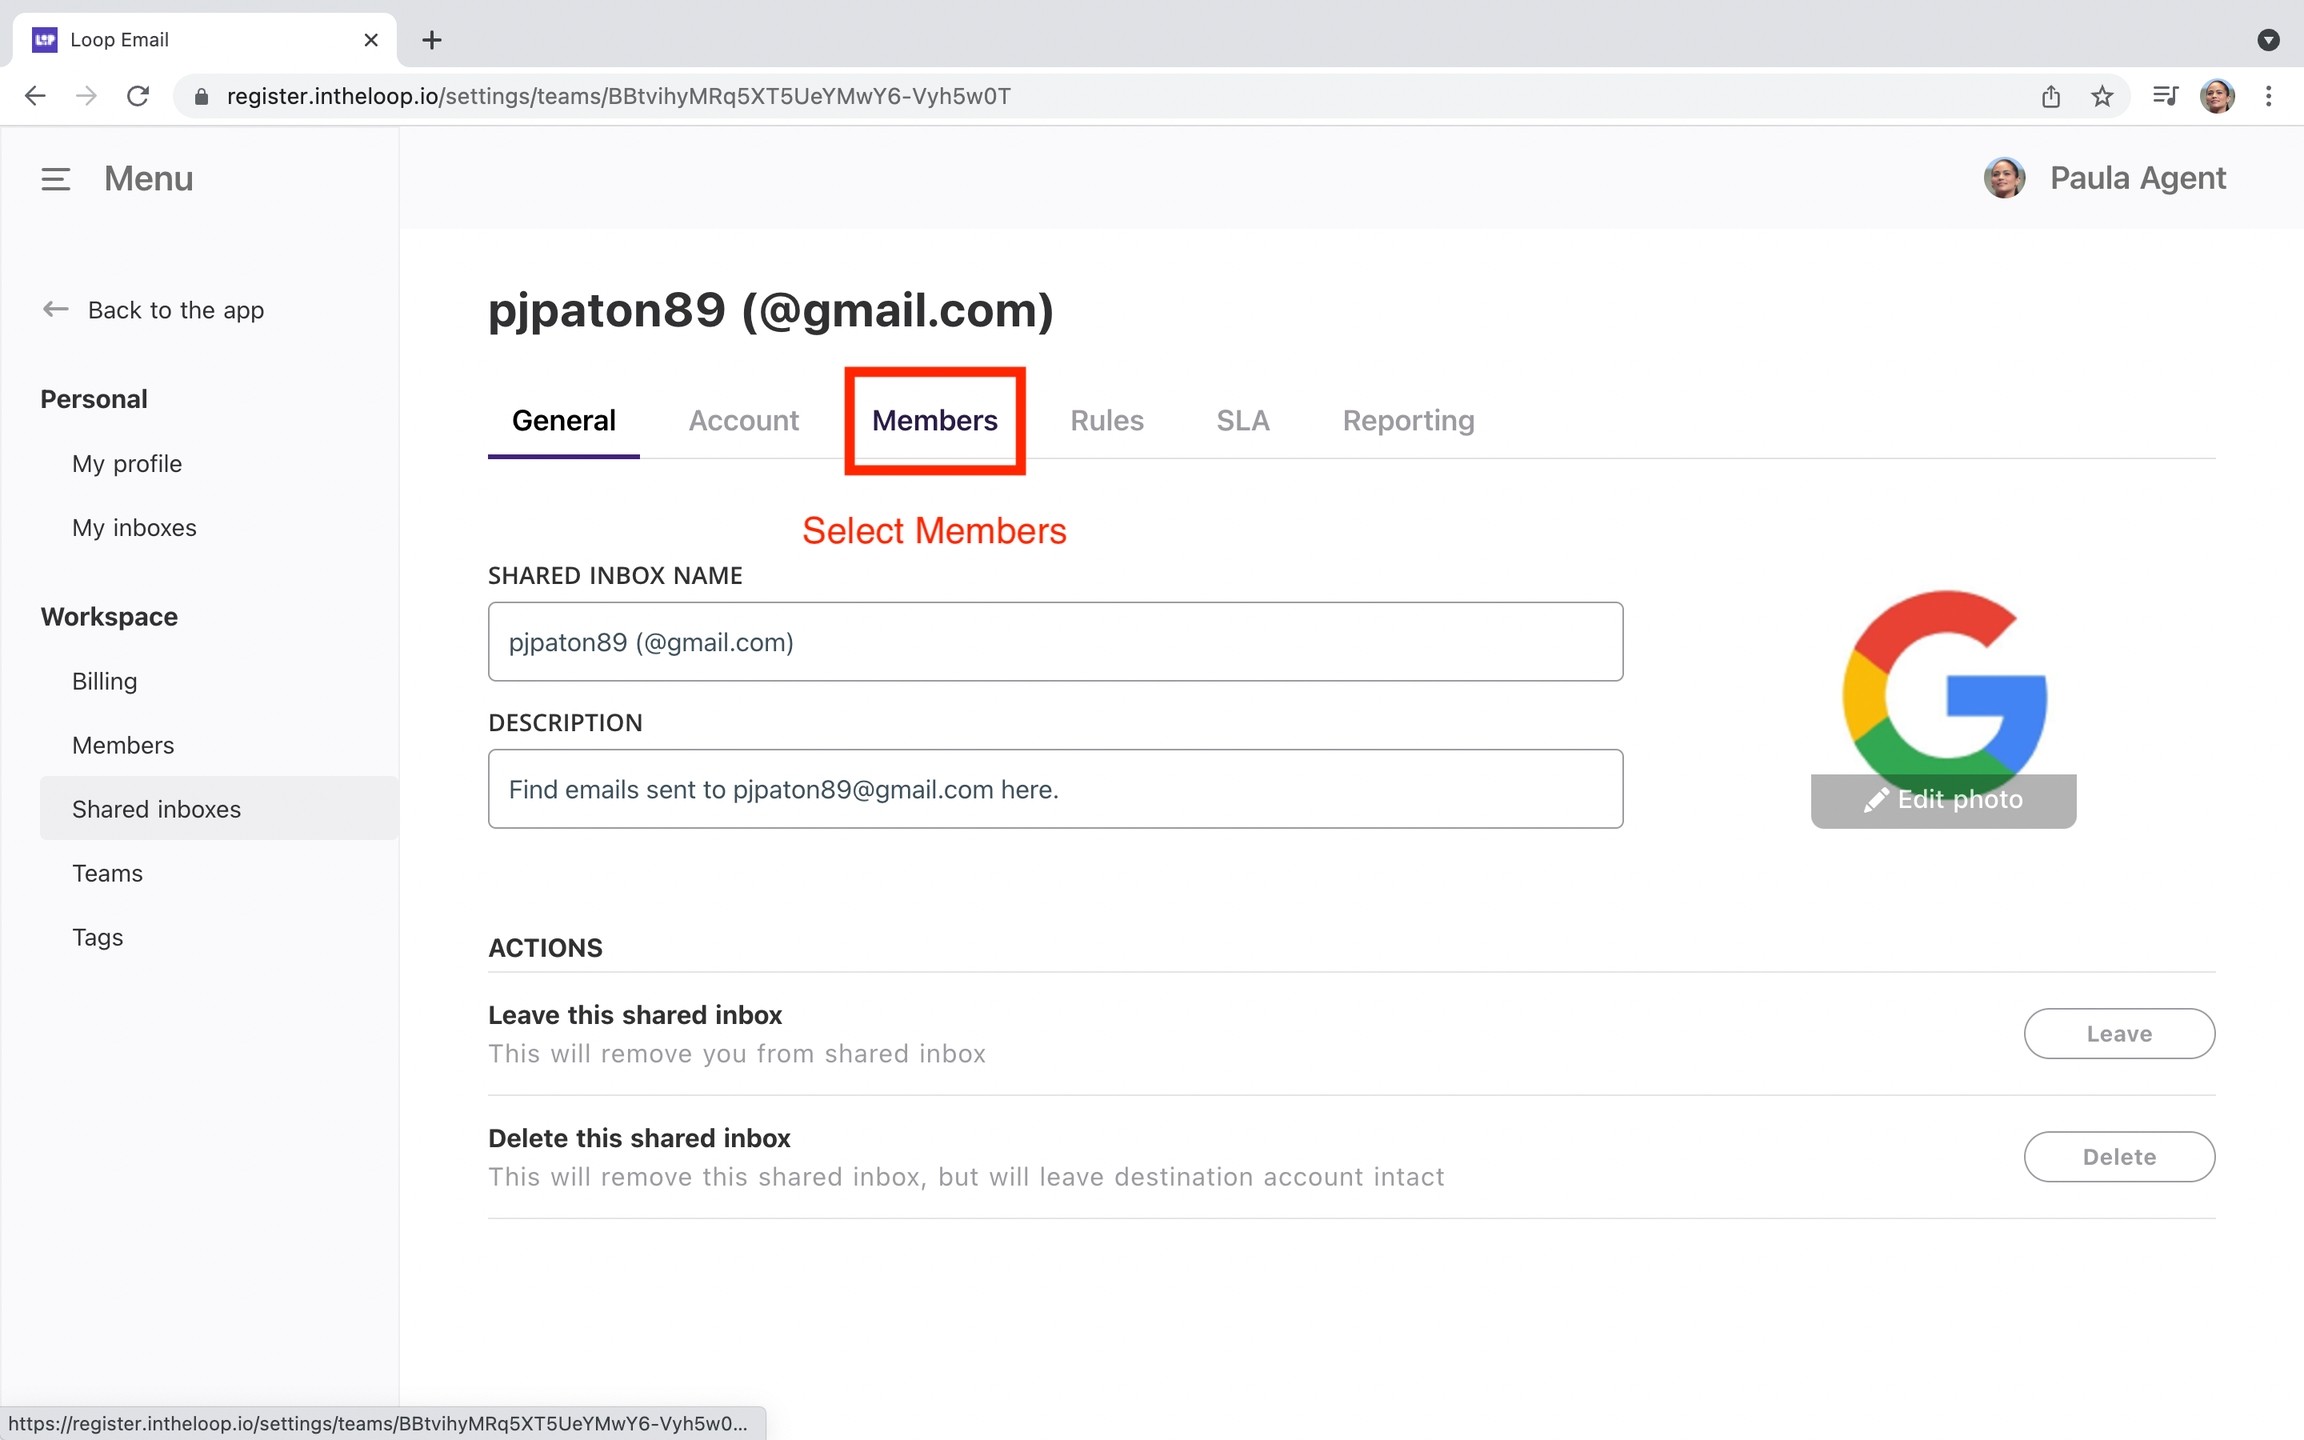
Going through either of these routes will open up the Shared Inbox Settings page which you see below.
Adding new admins
When you first open the Settings you'll land on the 'General' tab. To manage admins and members click on the heading 'Members' which will take you to the 'Admin' section first.
To add new admins:
Click on the 'Add' button to the right. This will open up a pop-up window with a list of contacts.
Select who you want to add as an admin.
If you cannot find who you want try searching for them via the search bar.
Close the pop-up window.
Adding new members
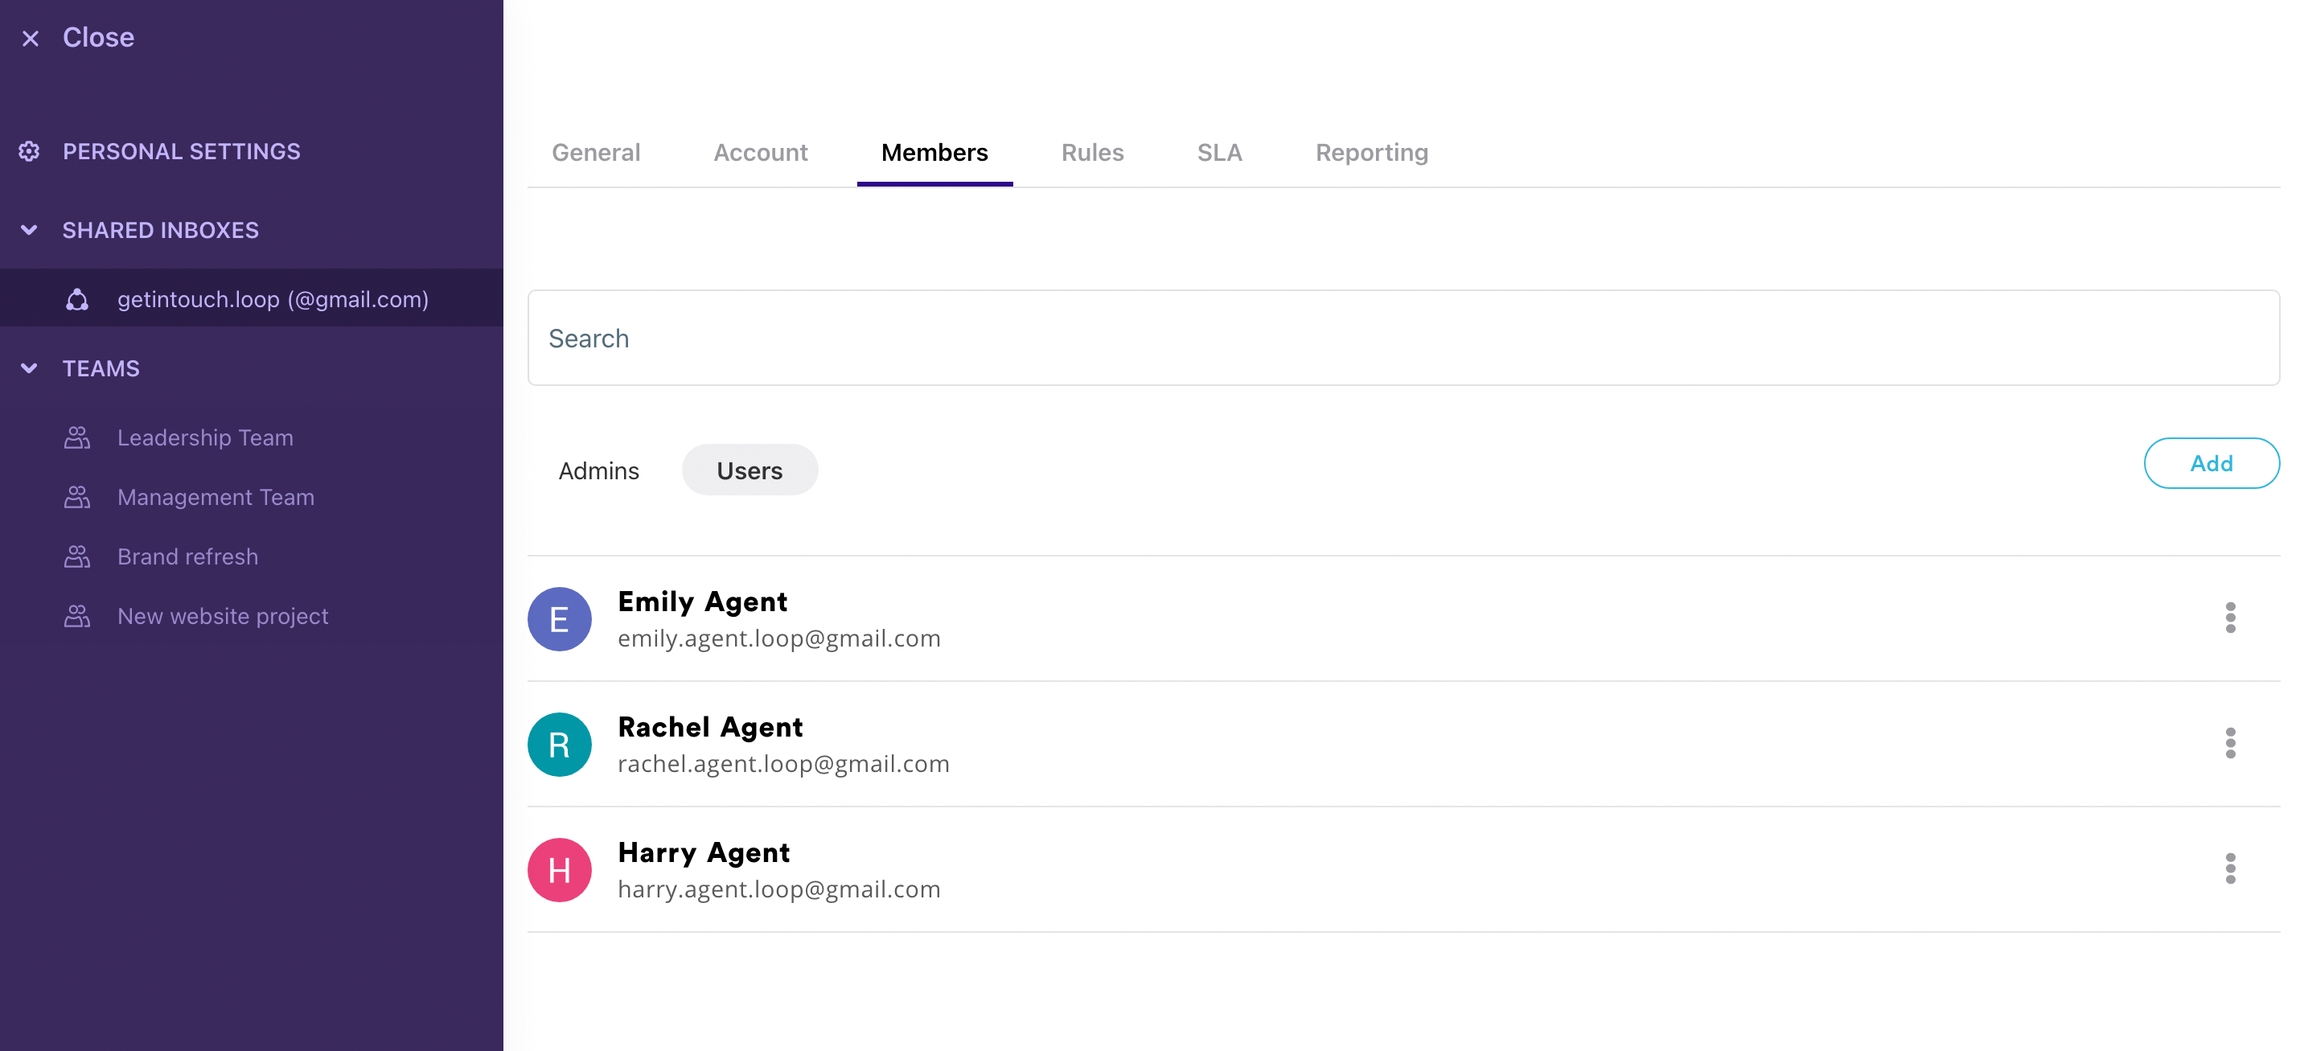
To add new members:
Click on the 'Users' heading.
Click on the 'Add' button to the right. This will open up a pop-up window with a list of contacts.
Select who you want to add as a member.
If you cannot find who you want try searching for them via the search bar.
Close the pop-up window.
Editing a user's shared inbox access
Once you have admins and users added to your shared inbox you can edit their access.
Admins
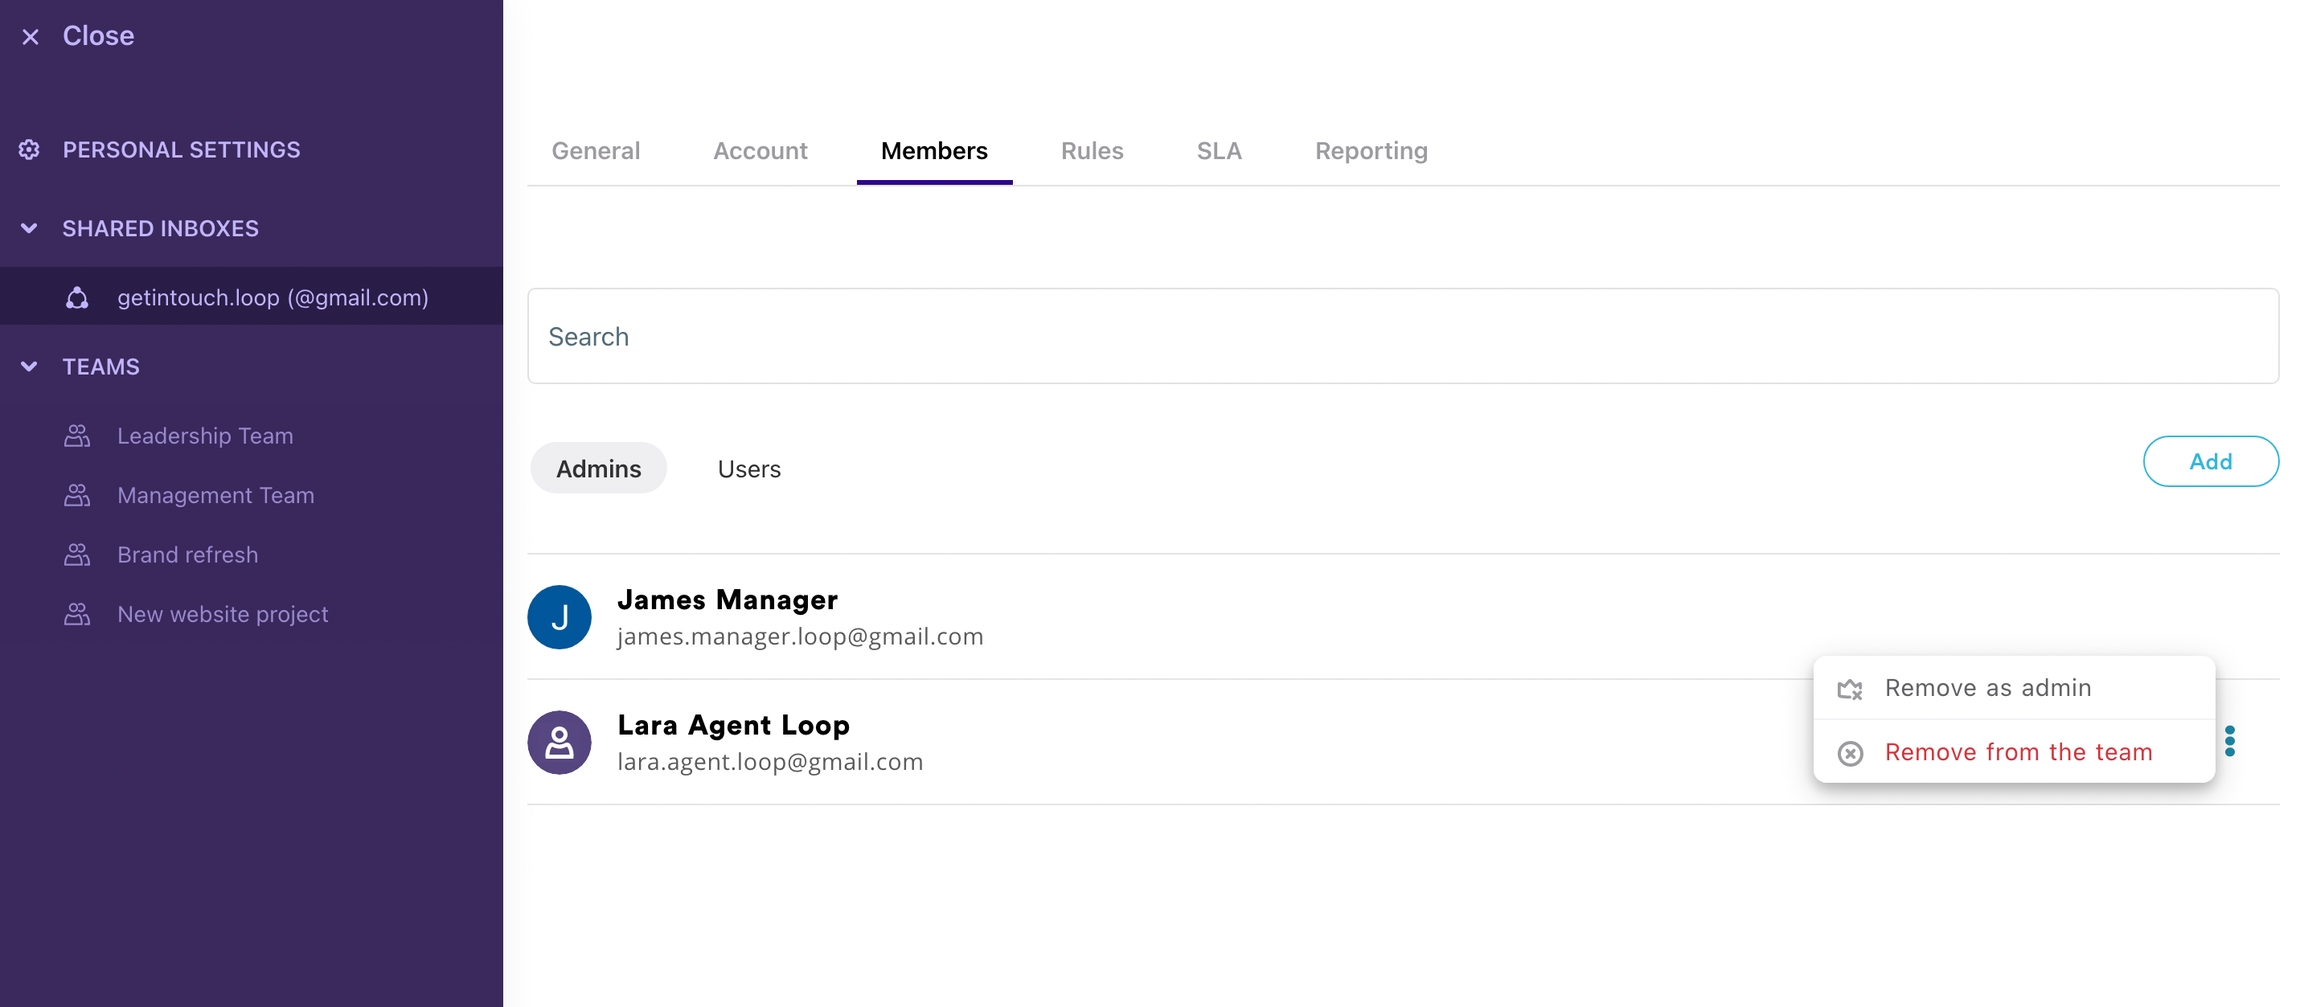
If someone else is an admin you can change their status to be a regular user or remove them from the shared inbox completely.
To do this, click on the three dots beside their name
Choose to either:
Remove them as an admin
Remove them from the team
Users
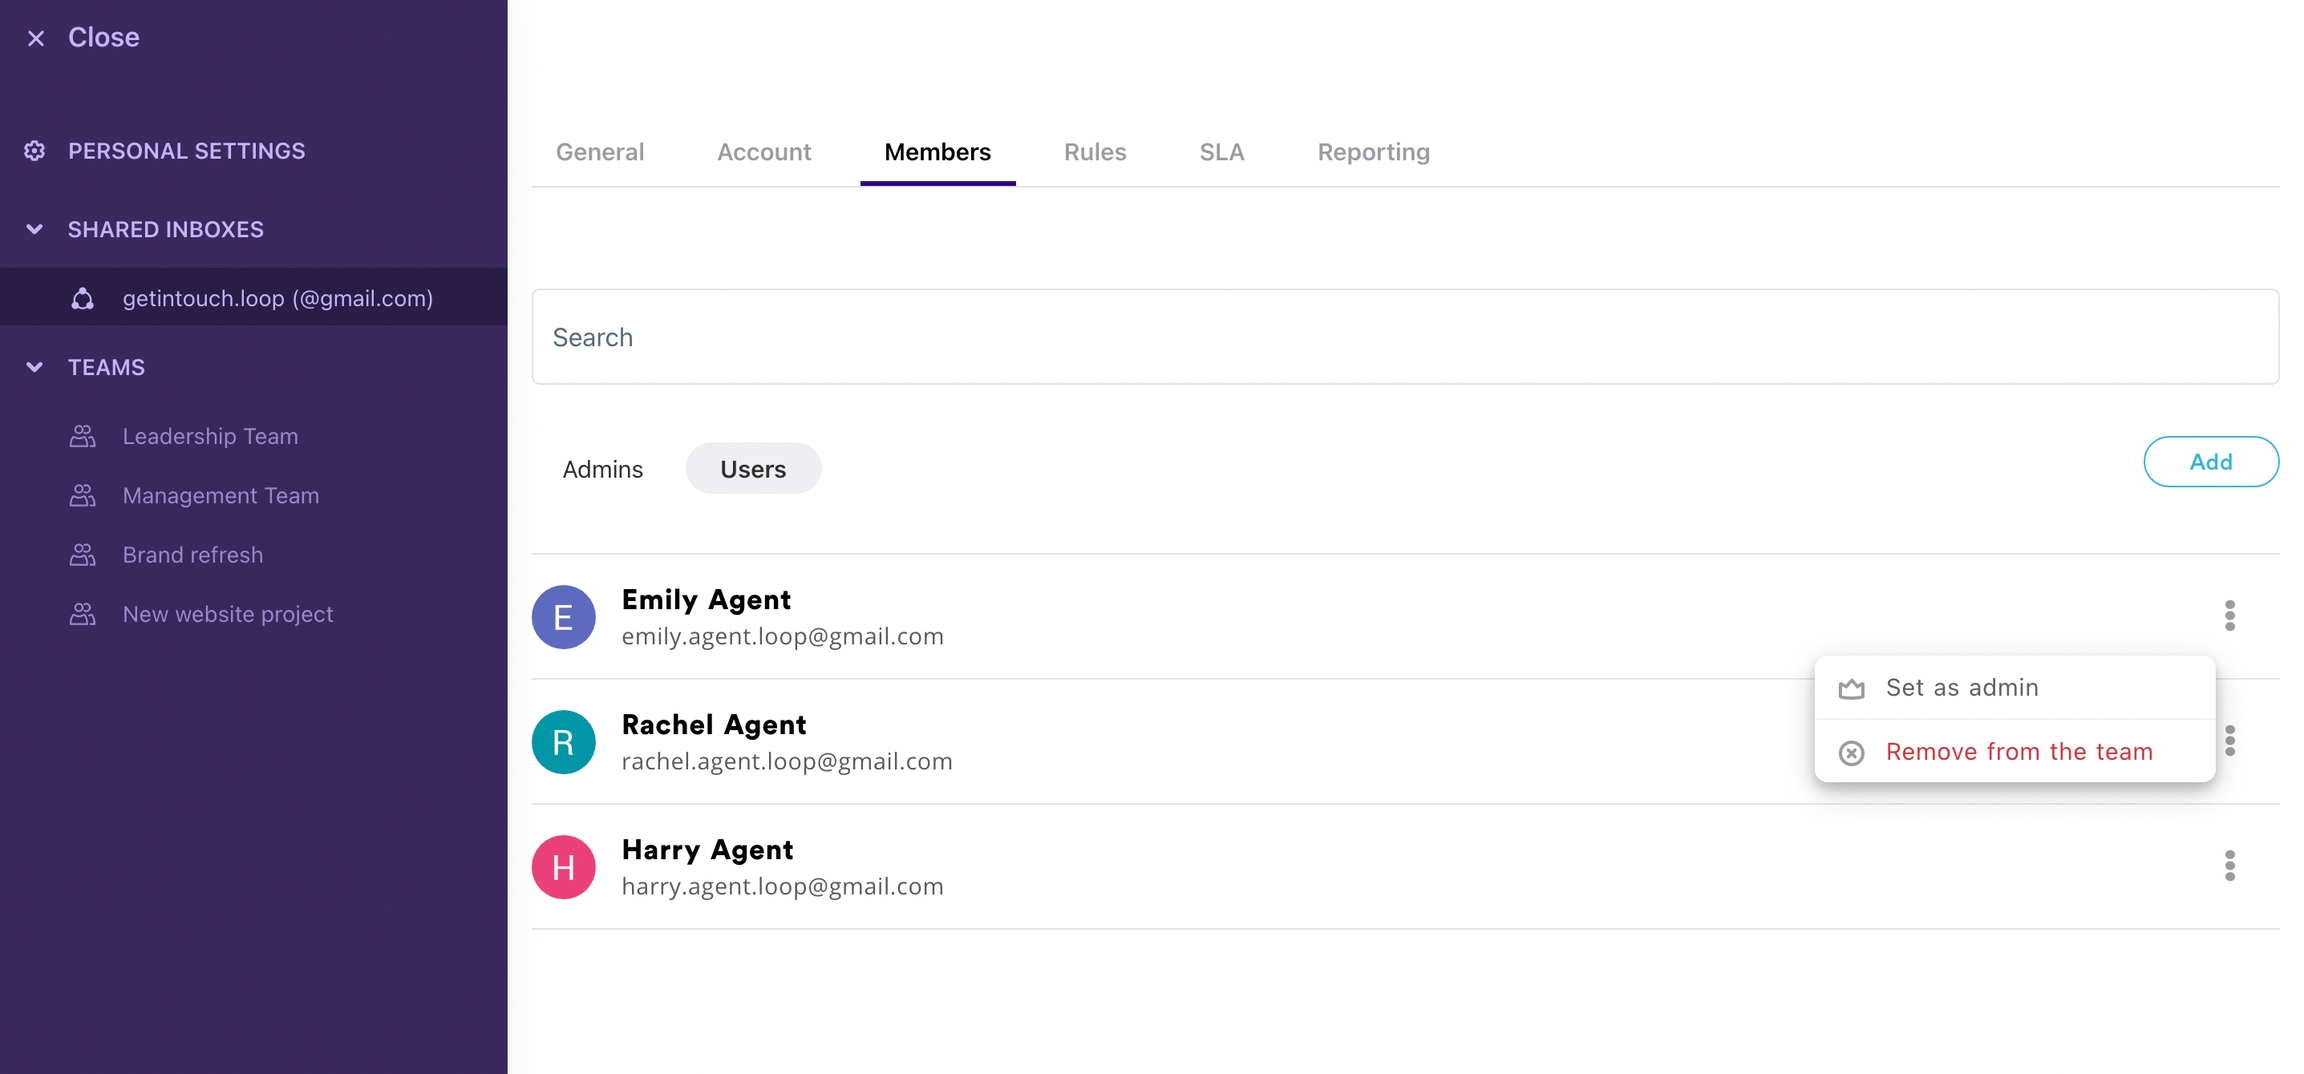
If someone is a regular user you can change their status to make them an admin or remove them from the shared inbox completely.
To do this, click on the three dots beside their name
Choose to either:
Set them as an admin
Remove them from the team
Last updated