How to set up an SLA?
Unlike complex help desk software, Loop allows you to integrate SLAs in the form of automated rules. You can apply specific SLAs to different shared inboxes and teams.
Finding your SLAs
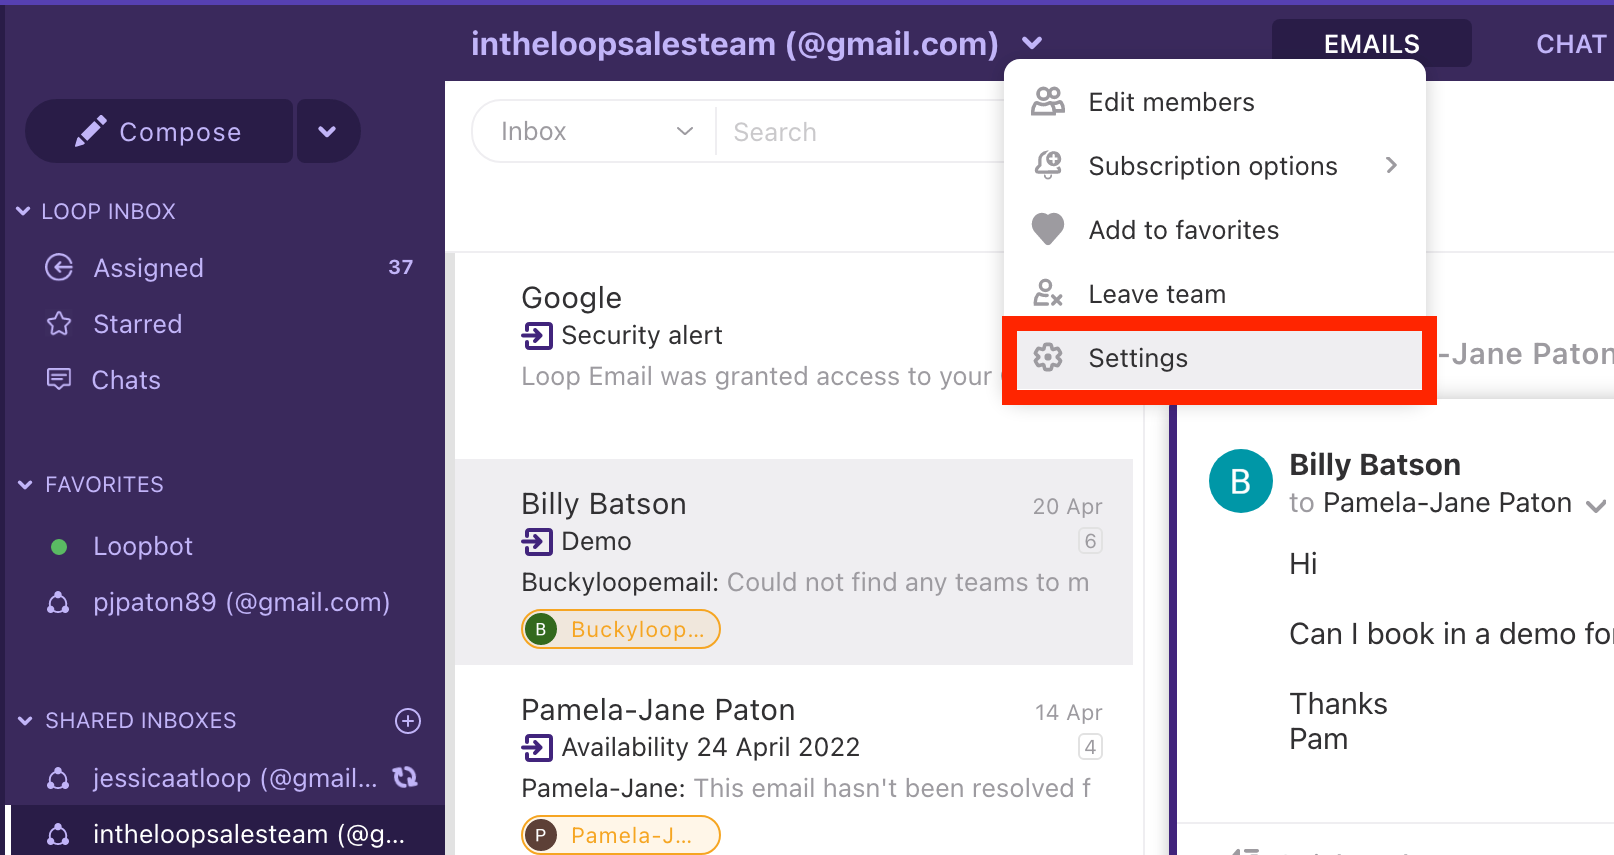
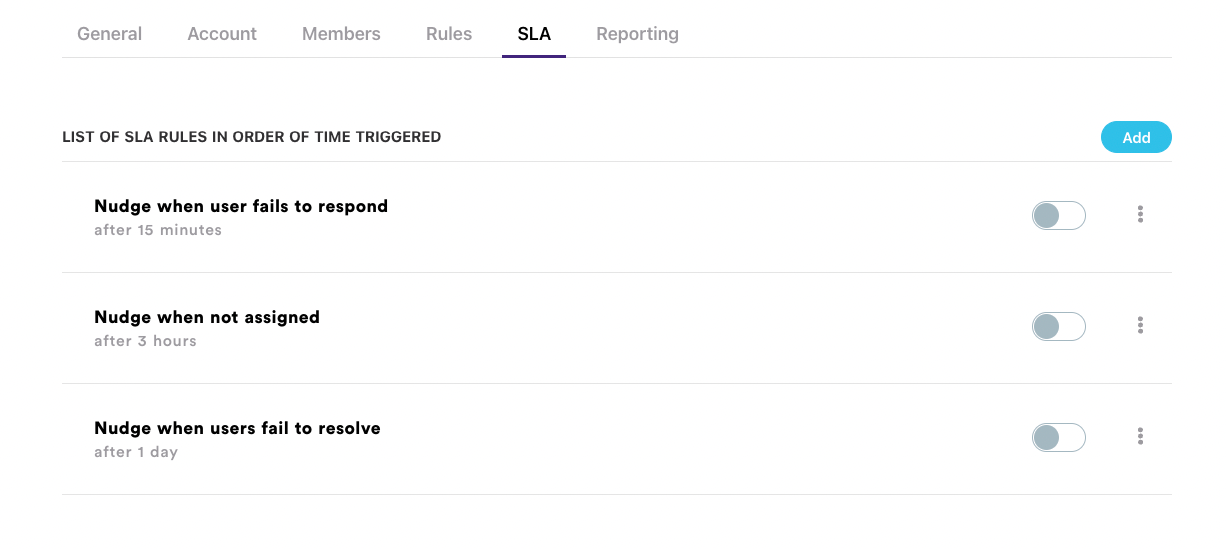
With Loop, you create your SLAs inside each shared inbox. Navigate to your inbox settings and press SLA. From here you can edit the existing SLAs we have created for you, or create brand new ones.
Choosing your escalation point
We have three bases to our escalation points:
Action when email is not assigned
Action when email is not responded to
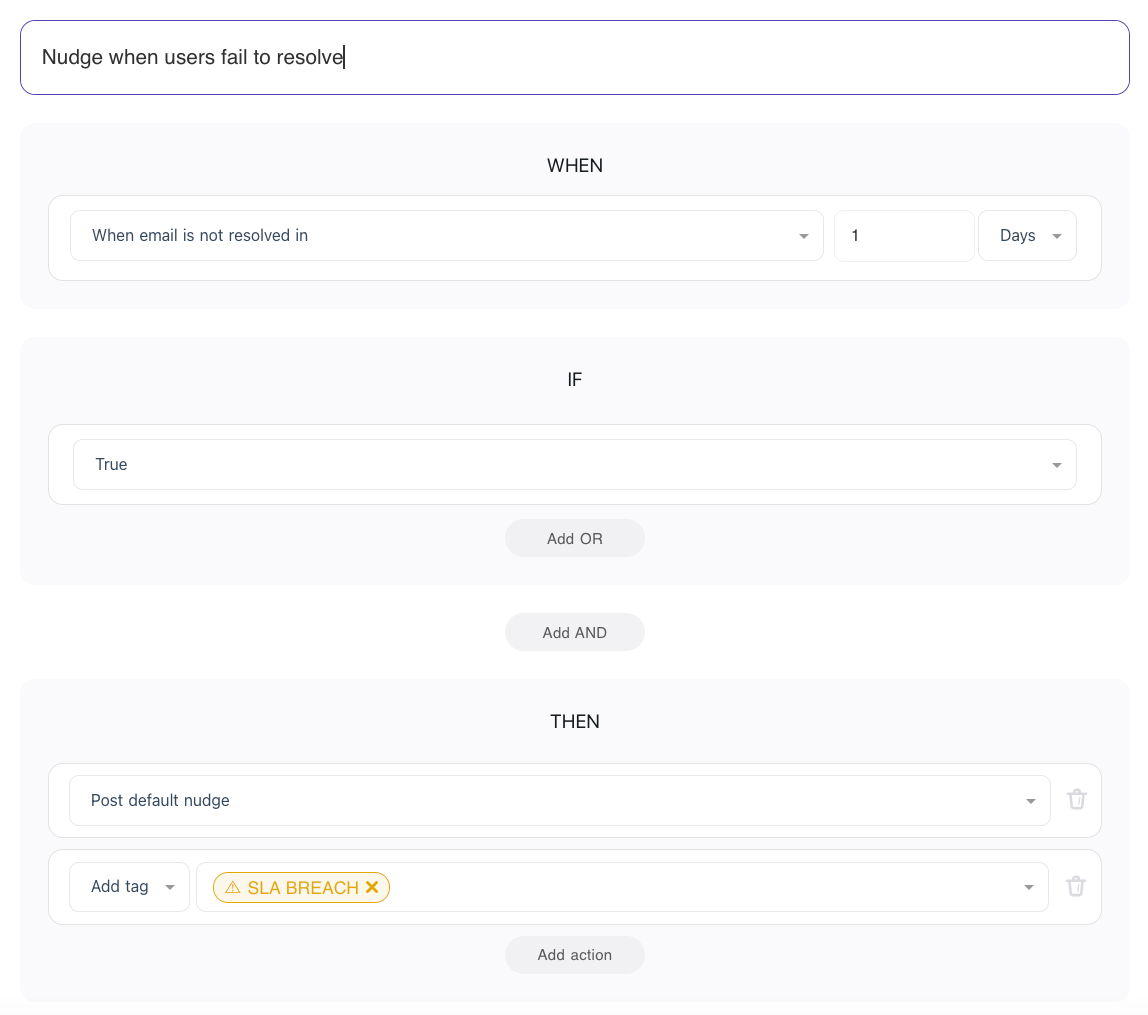
Action when email is not resolved
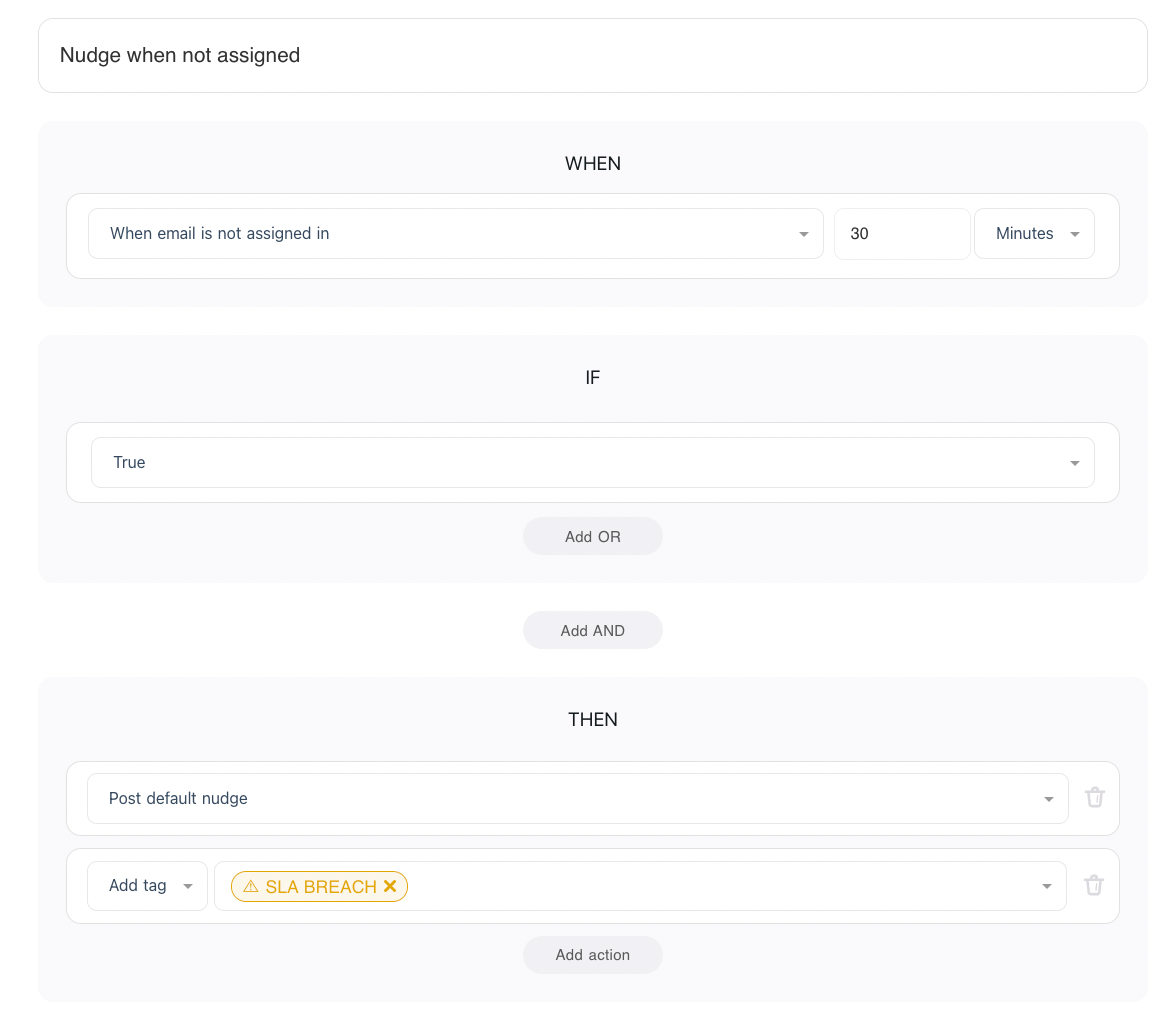
We will be creating three SLA's. The first one triggers a warning after 30 minutes if the message being left unassigned.
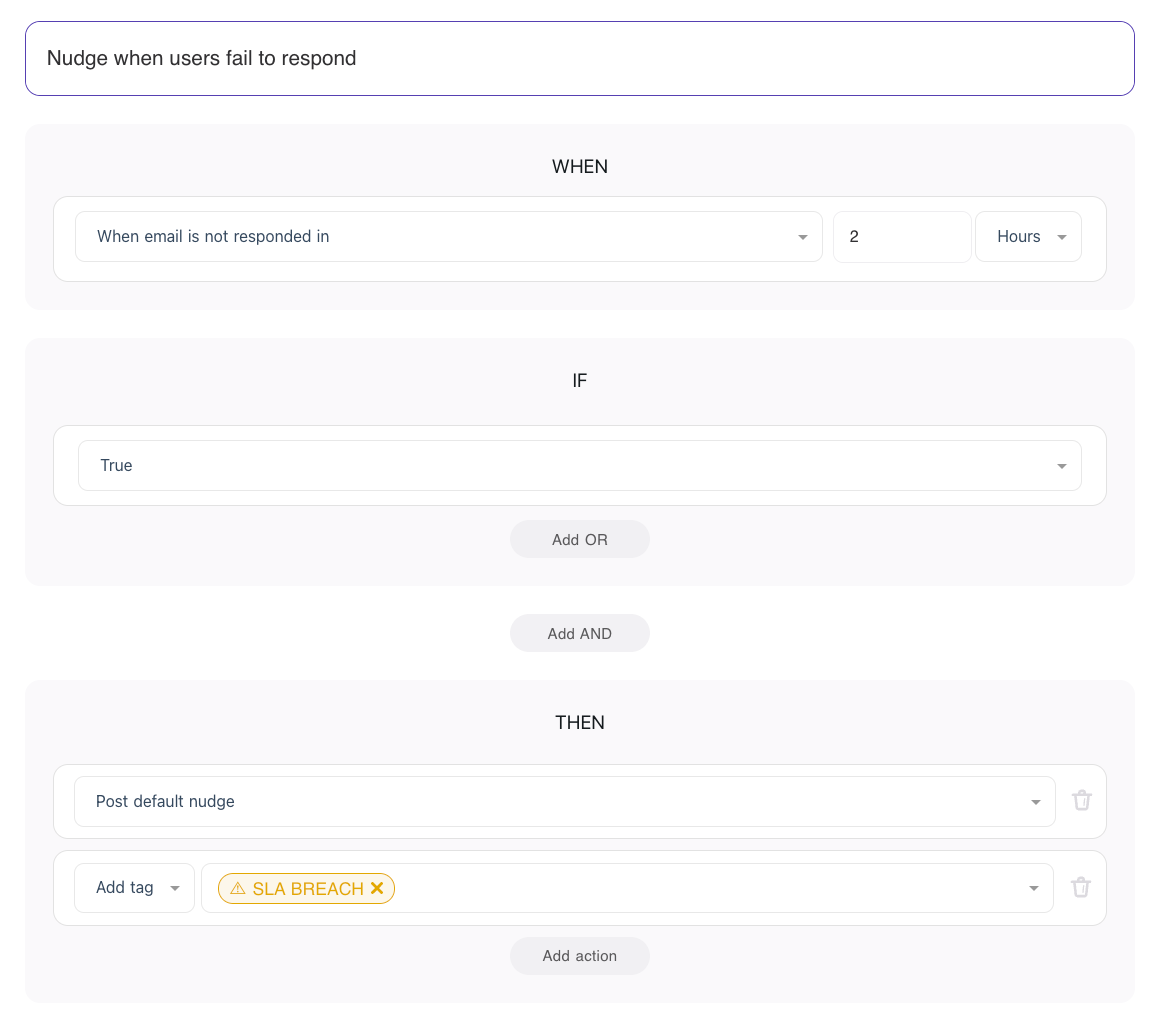
The second one will trigger after 2 hours if an email has not been replied to
Finally, an SLA will trigger in 1 day if the email has not been resolved
Tag-based escalation setup
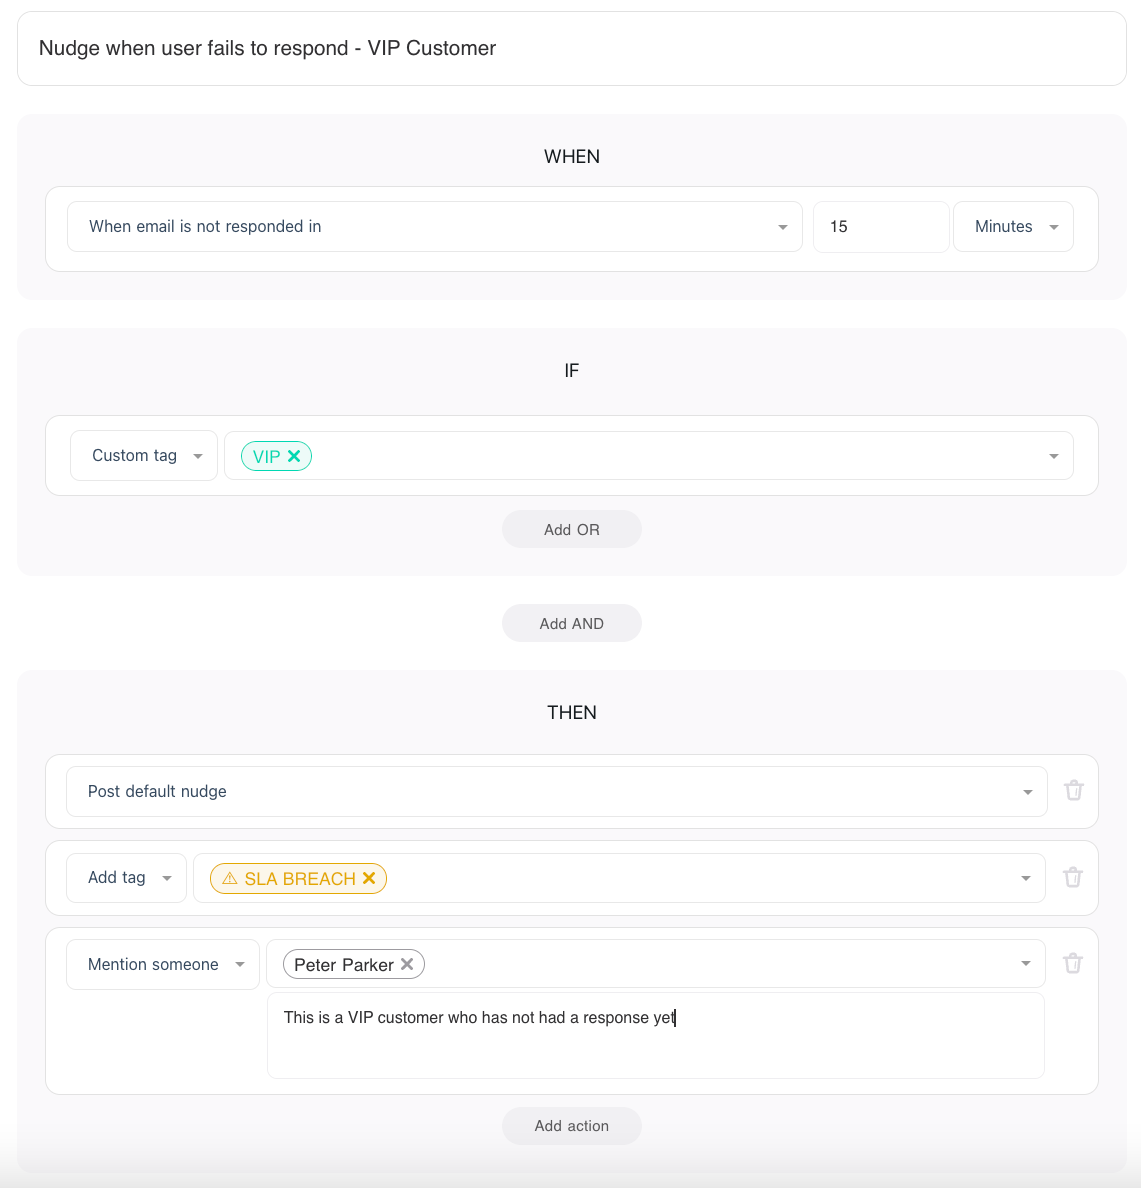
In this case, let's imagine we have a group of VIP customers. Currently we label emails from these customers with a VIP tag (manually or using rules)
We can create an SLA that triggers a note after 15 minutes if the message is still unresponded. A manager can also be notified of the breach.
Are you tired of customers complaining about unresponded emails? Or long response times? Are you ready to enhance your customer's experience? Then it's time to try Loop and adopt an SLA to achieve your response time goals.
Last updated